
Last Updated on May 7, 2026 by dhruwuttam58@gmail.com
Rooftop solar is no longer “experimental” in 2026 — it’s mainstream, but that also means more rushed installs, cut corners, and confused homeowners trying to make sense of their solar inverter installation. When the inverter is installed poorly, you don’t just lose a few percentage points of efficiency; you risk shutdowns, safety issues, and warranty disputes years down the line.
In simple terms, your inverter is the brain and heart of the system — it turns your panels’ DC power into usable AC energy for your home and the grid, and it needs the right location, wiring, and protection to do that reliably day after day. With rooftop adoption rising and more homeowners comparing quotes from multiple installers, it’s easy to assume “they all know what they’re doing.” However, in real installations, quality still varies a lot.
In this guide, we’ll walk through installing a solar inverter at a high level, then break down the five most common mistakes and how to avoid them. You’ll also see how choices about where to install the solar inverter, wiring, mounting, and safety checks affect efficiency, long‑term performance, and your wallet over the next 10–15 years.
Table of Contents
Why Solar Inverter Installation Matters More Than You Think
Your panels generate DC electricity, but your home runs on AC, so the inverter continuously converts DC to AC and synchronises with the grid, every second of the day. If the solar inverter installation is sloppy, you can lose several percentage points of energy from heat, voltage drop, or frequent shutdowns, which adds up to thousands of kWh over time.
Safety sits right alongside efficiency. Modern inverters must shut down correctly during grid outages (anti‑islanding) and work safely with batteries and smart‑grid controls, following standards such as UL 1741 and IEEE 1547 in North America. Poor grounding, undersized wiring, or ignored clearance rules can turn a safe system into one that overheats, trips breakers, or increases fire risk.
A common misconception is that “the panels are the hard part and the inverter is just a box on the wall.” In practice, many long‑term issues in residential solar systems stem from the inverter location, wiring layout, or inadequate inspections rather than from the panels themselves.
How to Install a Solar Inverter (Simple Overview)
If you’re wondering how to install solar inverter systems as a homeowner, it helps to think of the process in stages rather than getting lost in the details of individual cables and screws. First comes planning: confirming your load requirements, system size, and whether you’re using a string inverter, microinverters, or a hybrid inverter with batteries.
Next is location — deciding where to install the solar inverter so it stays cool, dry, shaded, and easy to access for maintenance and monitoring. After that, the installer mounts the inverter securely on a wall or structure and runs DC wiring from the panels and AC wiring to your main distribution board, often alongside disconnect switches, fuses, and protection devices.
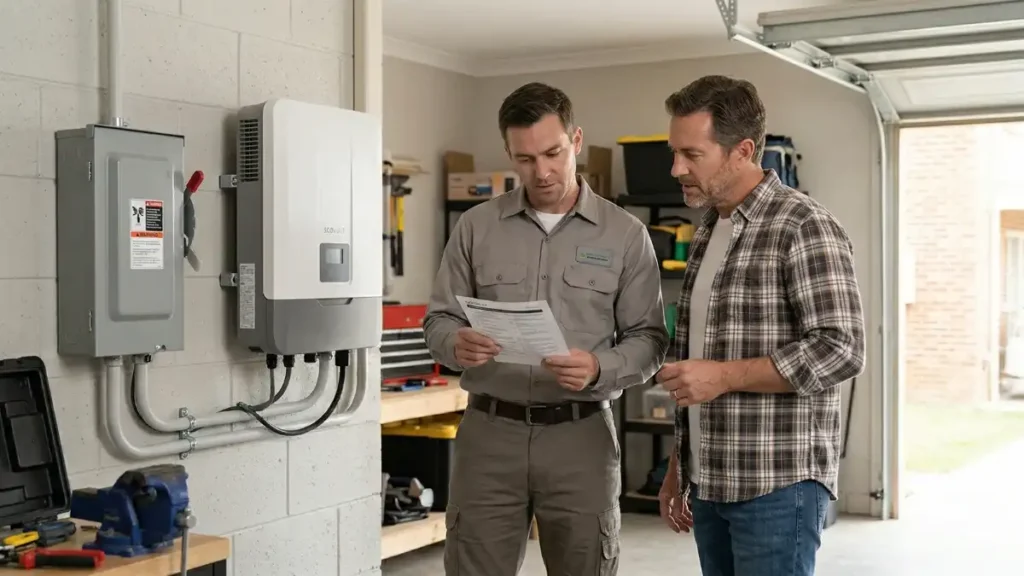
The final step is grounding and safety checks, followed by commissioning the system by powering it up, checking voltages, configuring monitoring, and ensuring it meets local electrical codes and utility requirements. Most homeowners should leave the hands‑on work to qualified professionals, but understanding this big‑picture flow helps you ask better questions and spot red flags early.
Mistake #1 – Choosing the Wrong Installation Location
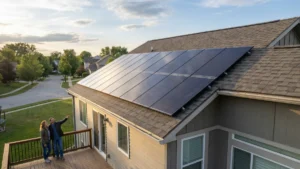
Many problems start with the most basic question: where to install solar inverter units, so they last. Heat is the number one enemy — inverters already generate heat during operation. If you install them in direct sun or hot, enclosed spaces, they can “derate” (reduce output) or shut down to protect themselves.
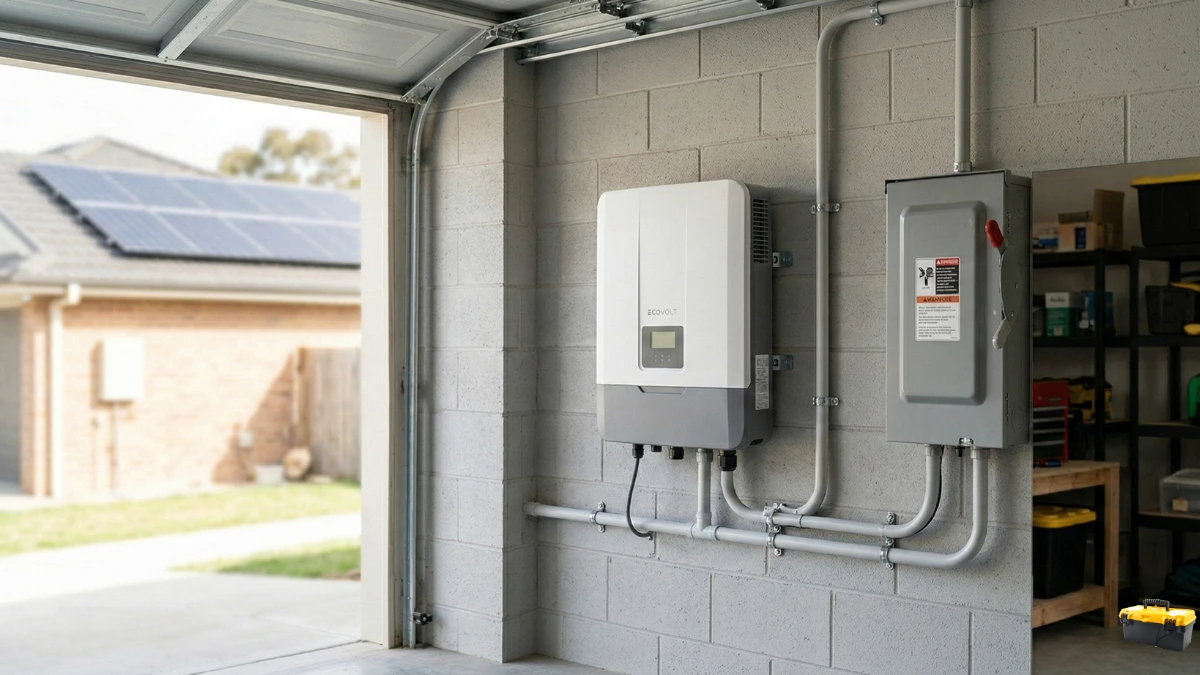
Ideally, the inverter should sit in a shaded, well‑ventilated area on a solid wall, away from stoves, water heaters, and damp corners such as leaky basements and humid laundry rooms. For many homes, a garage, utility room, or shaded exterior wall with a weather‑rated enclosure (IP65 or higher for outdoor installs) works well.
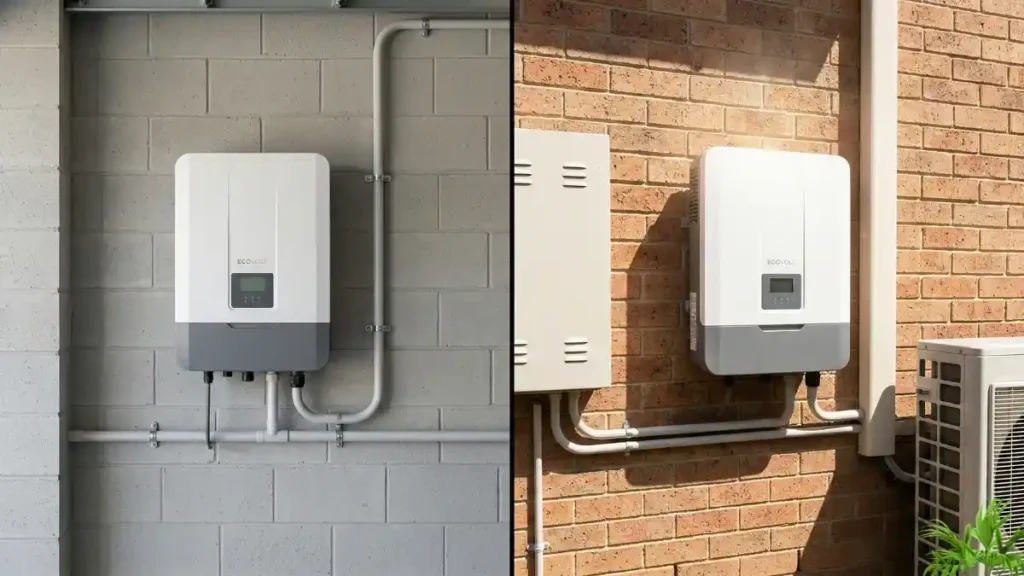
Indoor vs outdoor placement is a trade‑off. Indoor locations protect from weather but can overheat if the room is small and closed, while outdoor setups save space but require proper shading and a high‑quality enclosure. You’ll also want to think about noise; modern inverters are quieter than older models, but fans and transformers can still hum, so avoid bedroom walls or quiet home‑office spaces when possible.
If you’re mounting panels in trickier spots, like walls or balconies, your inverter’s location needs to be compatible with cable runs and structural access. A good starting point is to read up on mounting and airflow basics in a solar panel roof-mounts guide or a wall-mounted solar panels guide before finalising your inverter position.
Mistake #2 – Poor Wiring and Connection Planning
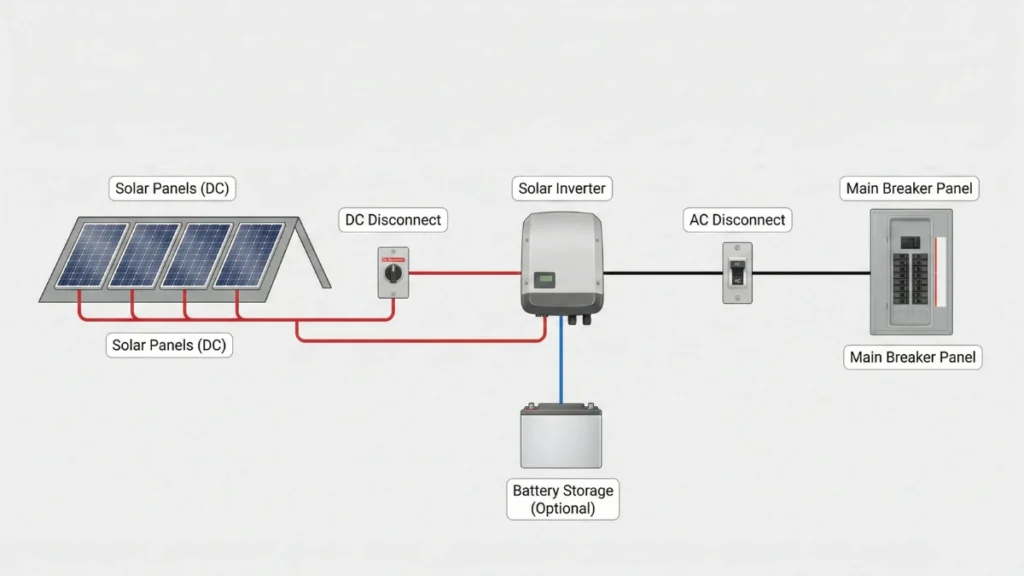
Even if the location is perfect, poor wiring decisions can undo much of that good work. A solar inverter connection diagram isn’t just paperwork; it’s the roadmap for how your panels, inverter, batteries (if any), and main panel all tie together safely.
When installers rush without a clear diagram and plan, you can end up with messy conduit runs, mixed‑up strings, undersized cables, or DC and AC lines criss‑crossing in ways that make future troubleshooting difficult and increase the chance of errors. Proper diagrams should show string configurations, breaker sizes, disconnect locations, grounding paths, and how any backup system is integrated.
From a safety perspective, poor wiring can lead to overheated cables, nuisance tripping, or mislabelled disconnects, all of which are flagged during good inspections and can cause delays or rework. If you use or plan to use a solar generator for home backup alongside your rooftop system, it’s even more important that your electrician coordinates the wiring to avoid dangerous back‑feeding and ensure everything works with your emergency backup plan.
Before installation, ask your installer to walk you through a simple version of the connection diagram in plain language. Hence, you understand what’s going on, even if you don’t plan to touch the wiring yourself.
Mistake #3 – Ignoring Mounting and Clearance Requirements
A lot of people see the bracket holes on the back of an inverter and assume “any wall will do,” but mounting and clearance are more important than they look. Inverters need adequate airflow around the casing so their internal fans and heatsinks can move heat away efficiently.
Many manufacturers recommend at least 15 cm (about 6 inches) of clearance on the sides and above the unit, but some require more, especially for larger hybrid inverters. If you cram the inverter into a tight corner or decorative cabinet, you’re effectively wrapping it in a warm blanket and asking it to work hard in summer, which leads to derating and premature wear.
The wall or structure itself matters too: it should be stable, non‑flammable, and strong enough to hold the inverter’s weight over many years without vibration or cracking. Mounting height should allow easy access to the display or QR code for Wi‑Fi pairing, and it should be safe for technicians to work on without the need for ladders in cramped stairwells or escape routes.
If you’re already deep into system design, it’s worth reviewing broader mounting and airflow concepts in a solar panel roof-mounts guide so your panel racking, cable routes, and inverter mounting all work together rather than fight each other.
Mistake #4 – Incorrect System Sizing and Compatibility
An inverter that’s the wrong size or type for your system can work on day one and still be the root cause of headaches later. If the inverter capacity is too small compared to the total panel wattage, you’ll see clipping on bright days, where the inverter limits output, and you lose potential energy production.
Going too far in the other direction and oversizing the inverter relative to the array can push you into a poor efficiency range during normal operation, especially in lower‑sun climates or seasons. Compatibility with batteries is another common trap; hybrid inverters are designed to work with specific voltage ranges and chemistries, and newer standards increasingly favour LiFePO4 storage with smart‑grid communication.
If you plan to expand later — for example, adding more panels after a few years or increasing battery capacity once your budget allows — your installer should factor that into the inverter selection now, rather than maxing everything out today. A good exercise is to compare your inverter’s rated output against your estimated daily energy needs using a resource like a “how many solar panels for 50 kWh per day” guide, then check whether your current design leaves room for growth.
Always ask your installer to explain, in simple terms, how they chose the inverter size and whether it’s designed for future expansion.
Mistake #5 – Skipping Safety and Compliance Checks
Once the hardware is on the wall and wired, many homeowners mentally tick the “done” box — but the safety and compliance checks at the end of a solar inverter installation are just as important as the physical work. Grounding (earthing) provides a safe path for fault currents and static charges; done poorly or not at all, it increases the risk of electric shock and equipment damage.
Surge protection is another non‑negotiable in 2026, especially in regions with frequent lightning or grid disturbances. Proper surge protective devices (SPDs) on both DC and AC sides help protect the inverter and other electronics in your home from voltage spikes. Local codes and utility rules may also require specific disconnect switches, labelling, and, in some cases, rapid‑shutdown capabilities so emergency responders and inspectors can safely interact with your system.
According to the U.S. Department of Energy, residential solar installations should comply with national electrical codes and local permitting rules, with inspections verifying that wiring, grounding, and inverter placement meet safety standards before the system is energised. Skipping or rushing these checks might save a day in the short term, but can cost you warranty coverage or even require partial reinstallation later.
Best Practices for Solar Inverter Installation in 2026
To make this practical, here’s a checklist‑style overview you can use when talking to installers or reviewing a proposed design.
Questions to ask installers
- Where will you place the inverter, and how does that location stay shaded, cool, and dry throughout the year?
- How much clearance will you leave around the inverter for cooling and maintenance?
- Can you show me a simplified solar inverter connection diagram and explain it in plain language?
- Is this inverter appropriately sized for my current system and any planned future expansion?
- How are grounding, surge protection, and disconnects being handled, and which standards or codes are you following?
Homeowner verification steps
- Confirm the inverter isn’t installed in direct sunlight, in cramped cupboards, on staircases, or in damp areas.
- Check that labels, breakers, and disconnect switches are clearly marked and reachable without special tools.
- Make sure the installer provides documentation, including a user manual, warranty, connection diagram, and compliance certificates, where applicable.
Maintenance planning
- Ask how often the inverter should be visually inspected and what common warning lights or app alerts mean.
- Plan basic cleaning (dust, cobwebs) around the inverter area so vents and fans aren’t blocked.
- If you’re also using portable solar gear or a solar generator for home backup, make a simple written plan that explains which devices to use in which situations, and how they interact with your main inverter.
Linking your inverter planning with more general system guides — like a portable solar power guide for smaller setups or a home backup guide for outages — helps you see your home energy system as a whole rather than a set of disconnected gadgets.
You can also explore how different solar energy gadgets fit into everyday life and work alongside your main system here:
How These Mistakes Affect Long-Term Solar Performance
Every small shortcut at installation shows up later in performance numbers, not just on day one. Extra heat from a poor location or blocked airflow forces the inverter to limit power output or cycle on and off more often, reducing overall efficiency and stressing internal components.
Wiring mistakes can cause voltage drops, unbalanced strings, or extra resistance, quietly wasting energy before it even reaches the inverter. Over time, that might look like “my system just doesn’t seem to produce as much as my neighbour’s, even though we have similar setups,” when the root cause lies in how the cables were run.
Incorrect system sizing or poor compatibility with batteries can limit how much of your solar power you can actually use or store, especially as your energy habits change with new appliances or an EV. On top of that, many manufacturers and insurers tie warranty validity to proper installation and code compliance, so avoidable mistakes can leave you with reduced or void coverage if something fails prematurely.
Practical Reality Check (2026 Perspective)
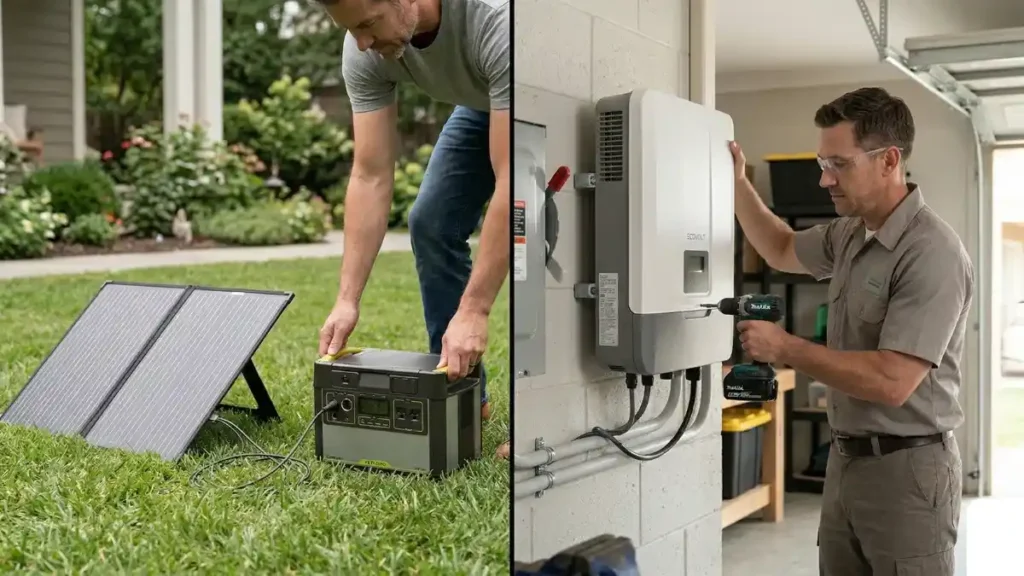
In 2026, it’s tempting to watch a few videos and assume a reasonably handy person can handle solar inverter installation as a DIY project. For off‑grid cabins or small plug‑and‑play portable systems, that might be realistic, but for grid‑tied rooftop systems, most countries and utilities now require licensed installers for good reasons.
The line between DIY and professional installation is clearer when viewed in terms of voltage, complexity, and risk. Small portable kits and solar energy gadgets are often designed for user installation. At the same time, fixed-roof systems with high‑voltage DC strings, building permits, and interconnection agreements are not. The International Energy Agency notes that as rooftop solar scales up globally, consistent installation quality and safety standards are critical to protect both households and the wider grid.
Cost vs safety is another balancing act. You absolutely want a competitive quote, but a suspiciously cheap one often means something has been squeezed — either the hardware quality or the time allocated for design, wiring, and safety checks. The good news is that modern inverters in 2026 are smarter, more efficient, and better protected against grid issues and cyber risks than earlier generations, as standards such as UL 1741 and UL 2941 continue to evolve.
If you want a more “hands‑on” role, a good compromise is to let professionals handle the electrical installation. At the same time, you focus on understanding the system, monitoring performance, and learning how different solar gadgets and backup options fit into your overall home energy plan.
Frequently Asked Questions
Where is the best place to install a solar inverter in a typical home?
The best spot is usually a shaded, cool, and well‑ventilated area, like a garage or utility room, or a shaded exterior wall with a weather‑rated enclosure for outdoor use.
Can I mount the inverter in my bedroom or living room?
Technically, it may be possible, but it’s not ideal due to fan noise, heat, and safety concerns. It’s better to choose a service area that’s easy to access but not part of your main living or sleeping space.
Do I really need a solar inverter connection diagram?
Yes — a clear diagram helps ensure correct wiring, simplifies inspections, and makes future troubleshooting or upgrades much easier for any electrician who works on your system.
How long does a typical residential inverter last?
Most quality inverters are designed for around 10–15 years of service, and some newer models offer warranties in that range, provided the installation follows the manufacturer’s guidelines.
Is it okay to oversize my solar panels compared to the inverter?
A modest oversize is common and can improve energy harvest in low‑light conditions. Still, your installer should stay within the inverter’s specified DC input limits to avoid damage or excessive clipping losses.
Do I need surge protection for my inverter?
Surge protection is strongly recommended, and often required by code. Surge protective devices help safeguard your inverter and home electronics from lightning and grid‑related voltage spikes.
What’s the difference between a string inverter and microinverters for installation?
String inverters sit in one location and connect to panel strings, while microinverters mount behind each panel. Installation planning differs, but both still require proper wiring, grounding, and compliance checks.
Can I add batteries later if my current inverter is not “hybrid”?
Sometimes you can add an AC‑coupled battery system. Still, it’s more flexible if your main inverter or a future upgrade is designed to work directly with batteries, especially modern LiFePO4 units.
How do I know if my inverter installation meets local safety codes?
You should receive documentation and sign‑off from your installer and, where required, from local inspectors or your utility confirming that the system meets applicable electrical codes and standards.
Are portable solar kits a good way to “test” solar before a full rooftop system?
Yes, smaller portable systems and solar energy gadgets can be an easy way to understand basic concepts and see real‑world benefits before committing to a full rooftop installation.
Conclusion – Avoiding Installation Mistakes Saves Money
Getting solar inverter installation right the first time is one of the easiest ways to protect your investment and keep your system running smoothly for years. By choosing a smart location, insisting on clear wiring and safety practices, and asking the right questions about sizing and compliance, you dramatically reduce the risk of failures, lost energy, and warranty headaches.
Used well, your inverter becomes a quiet, reliable workhorse that ties your panels, backup systems, and everyday solar gadgets into a clean, efficient energy setup that still makes sense in 2036 — not just in 2026.